Do you want to know how to build a golf simulator? If so, you should read this manual!
It costs a lot to buy a golf simulator. And if you want a full simulator experience with a high-quality tracking system, projector, turf, screen & enclosure, and feature-rich software, they’re very expensive.
But the good news is that you can build a DIY golf simulator by yourself and, in the process, save a substantial amount of money over buying a branded, ready-made product.
We will go over everything you need to know, including what tools you need, the various options to think about, and how to make a decision.
Table of Contents
Golf Simulator Room Dimensions
I need a golf simulator, how much space do I need? When looking for a location in their home for their indoor golf simulator, this is one of the questions our customers have the most frequently.
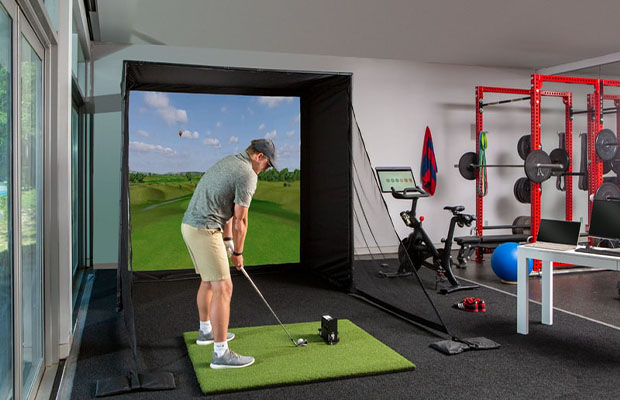
In this guide, we’ll start by addressing this crucial factor. Although there isn’t a single solution that works for everyone, it’s crucial to make sure you can swing the golf club freely and comfortably. Make sure your home’s golf simulator room is big enough—by width, depth, and height—to fit both your golf swing and the golf net and screen.
Ceiling Height
In our experience 9′ provides enough clearance for the average golfer. It will ultimately depend on your height and swing to determine whether a ceiling height of less than 9′ is suitable for you. Be sure to check the minimum height requirements for the impact screens, nets, and simulator enclosures before purchasing them to make sure they will fit your ceiling height.
Room Width
Check that your room has enough space for your golf simulator screen and/or golf net. The majority of the screens and nets we sell for golf simulators are between 5′ and 10′ wide. Additionally, it would be best to allow an extra 1 to 2 feet of room width if both right-handed and left-handed golfers will be playing. Typically we like to recommend a room width of 12′ so that your space is comfortable, although some of our systems will fit into a room width of 10′.
Room Depth
You should allow enough room behind you as well as some space between the impact screen and the wall, the impact screen and you. In our experience we feel that a room depth of 12′ is very comfortable and more than adequate for your set-up.
How to Build a Golf Simulator?
Step 1. Setup the Enclosure
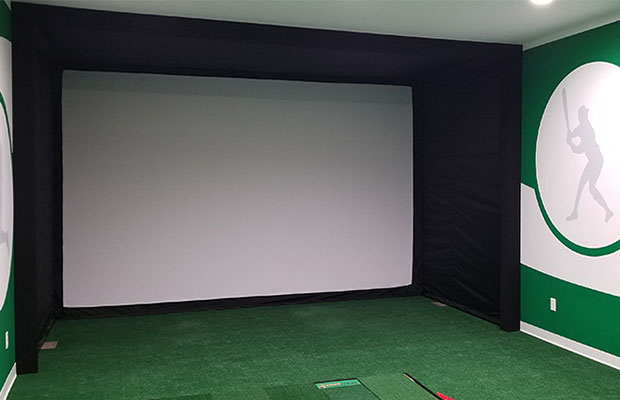
Setting up the enclosure’s frame is the first step in putting a home simulator together. After assembling it in the desired location in the room, install the netting or fabric to cover the area.
Step 2. Put the Screen Up
The impact screen needs to be installed after the enclosure is finished. Make sure the screen is stretched out as far as it can be by connecting the corners to the frame.
Step 3. Position the Impact Mat
The bulk of the labor-intensive lifting has been completed. Now it’s time to position the impact screen so that launch and ball flight can be measured from a distance sufficient from the screen. Run some software tests to see where it operates from if you’re unsure of how far away it should be.
Step 4. Setup the Software
As I’ve already mentioned, the software is included with your launch monitor product and is subject to license agreements. E6 Connect and World Golf Tour are the two most popular software choices.
Before using it, you must download the necessary software and finish the setup process.
When the software is ready to use, you can start swinging and start enjoying the fruits of your labor.
What Do You Need to Build Your Own Golf Simulator?
Space
Measure your playing area before constructing a golf simulator to make sure you have enough room. For instance, they advise a space that is 10 feet high, 15 feet wide, and 7 feet between the device and the impact mat when setting up a home simulator with a Trackman 4 launch monitor.
Your clubhead might hit the ceiling during your upswing if the ceilings in your room are too low. You run the risk of hitting the wall with your clubhead on your backswing if the area is too narrow.
Finally, to analyze clubhead and ball data, there must be enough room between the impact zone and the launch monitor.
There is no need to be concerned about the distance between the launch monitor and the impact zone if you purchase a launch monitor like the OptiShot 2, as the mat has sensors that record information when the ball is connected.
OptiShot advises that your mat be at least 8.5 feet away from the impact screen and that the ceiling be 9 feet tall. With 9-foot high ceilings, you should be safe if you are under six feet tall. People over six feet tall might require a higher ceiling, especially when swinging a driver.
15-feet of width is optimal for this setup. Having more room is beneficial because you are less likely to cause damage to your possessions. A shanked ball can ricochet anywhere, so check the larger room for anything delicate.
In general, there is not enough room for a golf simulator; rather, there is not enough room.
Launch Monitor
An instrument that can record clubhead and ball data is required for every simulator in order to improve your experience.
Laptop/PC
The software for the launch monitor must then be run on a laptop or PC. This improves your experience and shows your shot data and a view of the ball’s trajectory. If you decide to buy a launch monitor, make sure your current PC or laptop is compatible.
While the majority of software is compatible with both Windows and iOS, some may only work with one of these platforms. Getting a launch monitor that forces you to buy a new laptop or computer because it won’t run your launch monitor software is a pointless investment.
Windows and MacOS are both supported by the OptiShot 2 software. There is no need to buy a new computer if your laptop is running MacOS X 10.13, Windows 8, 10, or 11.
Software
You may receive a standard license for the E6 Connect or World Golf Tour (WGT) software with the launch monitor you select. This membership usually gives you access to one or two courses as well as a driving range. Additionally, it has a variety of games and skill tests that you can play against your friends.
The OptiShot 2 system, which gives you access to fifteen courses, including Torrey Pines South, is an alternative. Additionally, you can practice your driving techniques on the driving range and change the weather to make the challenge more difficult while also playing six games.
If you decide to upgrade your subscription, be prepared to pay up to $300 annually in some cases. I therefore suggest sticking with the OptiShot2 simulator if you are on a tight budget.
Projector
Although it’s not necessary, it’s highly advised to use a projector when using a golf simulator.
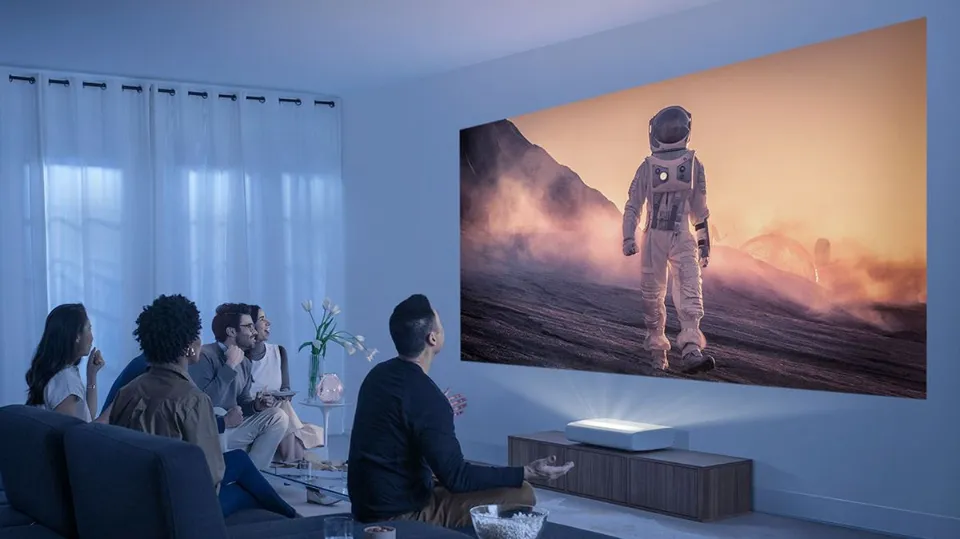
In order to see your ball’s trajectory in front of you, this device projects the digital feed of simulator software, which is running on either a mobile device or a PC, onto the impact screen.
On the market today are projectors that use lamps, LEDs, and lasers. Although lamp projectors are dependable and have been around for a while, laser and LED projectors require much less upkeep.
Related Reading: Best Projector For Golf Simulator
Screen
Spending less money on a net would be advantageous. But it wouldn’t provide the same protection and experience as a screen. Your ball is slowed down and kept from flying through the impact screen and into the wall behind it.
There are more cost-effective options available, but my recommendation is to take a look at a thick, robust construction, like ProScreens. Their impact screens have reinforced pockets and are made of high-quality, woven mesh to lessen the possibility of golf ball penetration.
Currently, a good 96 x 96-inch screen costs just over $200, but you can check the link above for the most recent price. Although there are less expensive options available, their build quality is in doubt.
Net
A screen and projector setup can be replaced with a net at a lower cost.
There are a few ways to get around the requirement that you view the golf simulation directly on your device when using nets. For instance, you could HDMI-connect your TV to your software feed and position the TV behind the network.
Similar to screens, nets are made to withstand the high-velocity impacts caused by golf balls, and the majority of net designs are excellent at stopping bad shots as well. Some nets are even made to return the ball to your feet after impact.
Hitting Mat & Landing Turf
It is not advisable to let your golf balls land and bounce on carpet or hardwood floors after each shot, nor can you hit your shots off of them. This is where landing turf and hitting mats come in.
The hitting mat is the surface on which you make your shots, as the name implies. It should be easy on the joints and feel like a fairway when hitting on mats.
Between the impact surface and the hitting mat, landing turf safeguards your floors. It completes the look of your simulator and can be used for walking and putting as well.
Tracking System
An electronic golf simulator’s brains are located here. It’s what makes golf simulation possible in the first place and measures ball and club data like ball speed, spin rate, distance, club head speed, and club path.
The simulator is useless without a tracking system. The launch monitor is used by the majority of less expensive golf simulator setups to collect data, but sensors and/or cameras mounted on the ceiling or in the ground may also be used.
Launch monitors and tracking systems may employ a variety of technologies, such as photometric, stereoscopic, radar, and infrared, as we discuss in this article.
DIY Golf Simulator Enclosure
A DIY setup does not necessarily require a golf simulator enclosure. However, it safeguards those nearby and your in-room belongings. The cheapest enclosure option is to buy a net and set it up all the way around your simulator.
Although a net does not give your setup the same polished appearance as the one in your coach’s studio, it still serves its purpose. A sturdy cage structure will cost between $300 and $500.
Consider using the Yunic Metal Golf Cage as a starting point. Because of its sturdy construction, your ball won’t fly off and hurt your visitors or the room. Its 10-foot height and 10-foot width provide enough room for any impact screen.
Final Thoughts on How to Build a Golf Simulator
You now know how much a DIY golf simulator costs, what it requires, and how to build one. Compared to buying a full simulator set, you can save a lot of money by buying the parts separately.
Regardless of how you want to mix and match your golf simulator, saving money by doing as much as you can on your own instead of purchasing everything pre-made will be a huge benefit.
Overall, if you buy a cheap launch monitor and follow the above instructions, you should be able to set up a home golf simulator for less than $2000.
Read More:
DIY Golf Simulator FAQs
How Much Does It Cost to Build a DIY Golf Simulator?
You will spend about $1900 constructing a quality homemade golf simulator setup. That amounts to nearly ten times less than the entry-level structures offered by companies like Trackman or Foresight Sports.
How Do I Make a Cheap Indoor Golf Simulator?
An inexpensive launch monitor, impact screen, and mat are required to build a low-cost indoor golf simulator. You can get a cheap indoor golf simulator once you buy these items separately using the links I provided above.
How High of a Ceiling Do I Need for a Golf Simulator?
The minimum golf simulator ceiling height is 8.5-9 feet, although, depending on your height and your golf swing, 10 feet is a much more comfortable option.

