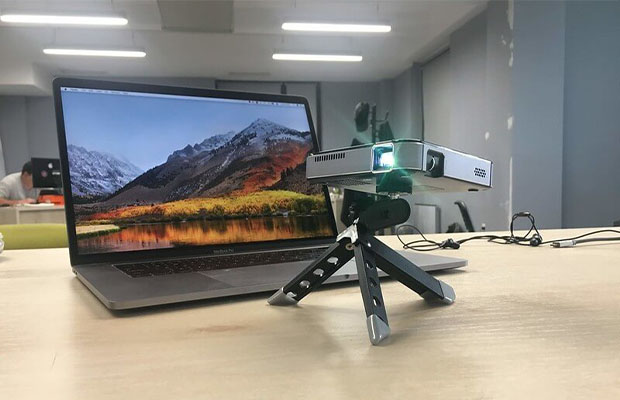
When you’re about to give a presentation or just want to set up a home theater system, you can connect your Mac computer to a projector.
In order to share your screen with a large audience for presentations, movies, and other uses, you can easily connect a projector to your Mac. However, due to their inability to identify the proper cable to use, many people find it challenging to establish a connection.
This is what you need to do and how to set it up.
Related Reading: Why Does My Macbook Not Detect The Projector?
Table of Contents
How To Find The Right Adapter For Connection?
Apple is a company that frequently updates the ports and connections on its products, for better or worse. They are now both recognized as trend-setting businesses; do you remember when they were the first to do away with internal CD drives? — and a frustrating one — remember how they decided to remove the headphone jack from the iPhone?
The ports used to connect your computer to a projector are identical, and if you have a Macbook Pro, Air, or desktop from the last ten years, you may use one of no less than four different connectors. Finding the appropriate one and adapter for your projector from the start will help you save time and headaches.
To find out what ports your Mac has, visit this Apple support page.
You’ll probably need a Thunderbolt/USB-C adapter for newer Macs, which outputs to HDMI or VGA, the most popular input types for home theater and professional projectors, respectively.
Steps To Connect MacBook To Projector
Our technical team has provided a thorough how-to guide that can be found below.
Step 1: Start Your Mac Air
You must turn on your Mac Air first. Before using it, you must make sure that it is charged. Furthermore, you can use it while charging by plugging it into a socket and using a certified charger.
Step 2: Power Your Projector
Find a current-filled electrical outlet, insert the projector’s cable, and turn it on. Check to see if you plugged the cable in correctly and tightly if the power hasn’t yet turned on.
Step 3: Connect The Cables
You must pay close attention at this point. It depends on the computer’s ports and what kind of connection your MacBook Air can make to a projector. An HDMI, VGA, or USB-C port is not available on all MacBook models.
There are usually VGA, HDMI, and USB-C cables. If your MacBook has an HDMI port, you can use an HDMI cable to connect it to the projector. The projector and MacBook both need to have VGA ports, so a VGA cable will work.
When connecting an older display with a USB-C port to your Apple device’s USB 4 port, you may need a Multiport adapter. To connect a MacBook Air to a projector without problems, you must be aware of these ports.
To connect your Mac to the projector, you can use either of the cables. If the HDMI, VGA, or USB-C ports are not available, keep in mind that you may still require a suitable Mac adapter cable to connect. The connection can be made without an adapter if the display is brand-new if you use a USB-C cable.
Step 4: Open The Apple Menu
Tap on the top-left corner of your screen to access the Apple Menu after you have properly connected the cables to the appropriate inputs. Select Preferences from the drop-down menu.
Step 5: Select A Display
From the System Preferences menu, pick “Display.” Tap “Detect Displays” when the Display window appears.” Your MacBook Air should be connected to the projector at this point.
Start over at steps 4 and 5 if the two devices haven’t been synchronized yet. When the Display window appears, select Arrangement by tapping it.” To check if the images are being displayed on the computer and projector in mirror form, check the Mirror Display box below.
By navigating the Display Menu on your MacBook Air, you can change your display’s settings. You can change the resolution and rotation of the image, adjust the refresh rate, and the relative position of the pictures
Steps To Customize The Display From Your Macbook
You can change a few picture settings in System Preferences after connecting the projector to your MacBook. The location of them is given here.
Depending on the maker and model of your projector, display settings might change.
- Click System Preferences under the Apple menu on your MacBook.
- Select Displays.
- Your device’s name appears at the top of a window that opens. Next to Optimize For, choose either this device or your built-in display to change the resolution of both your the projected image and, if different, the MacBook.
- You may also see Rotation settings, which let you change the orientation of both your MacBook and the projection at 90-degree angles.
- If you get any lag on the projection, you should also be able to adjust the Refresh Rate using another menu.
- The Underscan setting lets you adjust the relative size of the display in the projected image. Drag this slider to the right to reduce the display’s size.
- You can also choose whether the projector replicates your MacBook exactly or just extends it. If you have extra windows that you don’t want to announce to everyone, this setting is helpful. To change this setting, click the Arrangement tab at the top of the window.
- To use the projector as a second desktop, uncheck the box next to Mirror Displays. This choice might also be available on your MacBook’s Touch Bar.
- The two desktop icons’ positions can be moved in relation to one another by dragging them. Your MacBook’s screen is represented by the one with the white bar at the top.
How To Adjust Your Display Settings On MacBook?
Your projector may need a few adjustments once you’re connected in order to function as you desire. To alter your display’s options:
1. From your Dock or by clicking the Apple icon in the top menu and choosing “System Preferences,” access System Preferences…” from the dropdown menu.
2. Select “Displays.”
3. To display exactly what is on your Mac desktop, choose “Mirror Displays” or “Arrangement” to switch between using your projector as a second screen.
The Wireless Streaming Option: An Alternate Route
Streaming sticks are an acceptable substitute for adapters and the tangles of a wired connection.
A streaming stick like Google’s Chromecast (Amazon’s Fire Stick doesn’t support screen mirroring on macOS; it only needs to be plugged into the back of your projector or entertainment system) can mimic much of the functionality of a wired setup if you’re planning to stream specific media, like Netflix, or share your desktop or a presentation.
It will, however, only function if you have a Wi-Fi connection.
Summary
Because the cables are sometimes frayed or not plugged in tightly, your MacBook Air might not be connecting to your projector. It’s also possible that there is no current flowing through the socket.
A larger display offers more detailed information. Fortunately, our experts have covered everything you need to know about connecting a MacBook Air to a projector in this guide.
Watching those movies and giving those excellent office presentations can now be more enjoyable for you. Please leave a comment below with any queries you may have regarding the MacBook projector connection, and we will do our best to assist you.

